
Contrary to popular opinion, a good photograph is not in the can by luck, but more to the decision-making. Many things need to think about before making a photograph. For beginners, it's hard to think about so many steps. But with a continuous exercise, I'm sure we'll be able to do it naturally.
1. Find an interesting subject
Try to choose an interesting subject, for example in the streets of a busy, try to take portraits of people, a building, car or an activity. Be careful not to put too many elements in the photo. Too much detail will make people see the photos become confused about what you want to convey.
2. The quality and direction of light
Knowing the quality and direction of light greatly affect the atmosphere of the photo. In general, there are three types of light
Light that is hard (hard light): Usually obtained from a relatively small light source / concentrated. For example: sunlight, camera flash, flashlight.
Light (soft light): Usually obtained from the light source is relatively large. Examples of soft boxes, reflectors, the surface of the ceiling.
The latter is a light spread (diffused light). This model of light coming from the light source is relatively very large. For example, when cloudy skies or clouds.
Direction light (front, back, sides, top, bottom) is also an important aspect to give a certain impression. Take a good direction and quality of light.
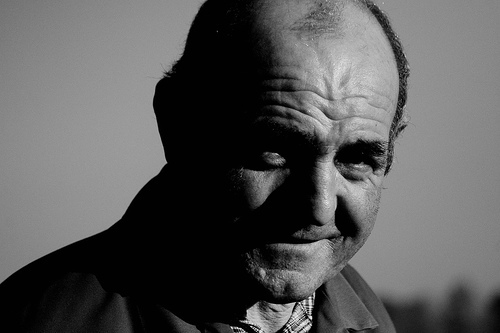 |
Light that is hard (hard light) providing a dramatic atmosphere and accentuate the character of the subject |
3. Composition
The first step in making a good composition is the start of choosing the background. The background is clean / smooth is a good first step. Then position the subject within the layers. Arrange so that the composition of the photos look interesting.
If you are just starting photography, you can always learn the formulas the composition as a reference. Many of the rules of composition that can help you make an interesting composition such as rule of thirds, golden ratio, scale and others.
4. Select the aperture / aperture
Lens aperture determines how much light entering the camera body. Aperture also set the depth of focus (depth of field). The larger the aperture, the thinner the depth of focus and vice versa. We must determine whether the photos that we take has a thin depth of focus or deep.
In general, for portraits, we want the depth of focus is so thin that it looks more artistic portraits, so that the openings that we select should be large. But if we picture the scene, we usually want all the elements in the images look clear and focused, then the openings that we select should be minimal.
5. Select the shutter speed / shutter speed
Then, we must determine whether we want to freeze the subject of the picture, or record the movement of the subject. If we want to freeze the subject, we must carefully set the shutter speed.
To prevent blur due to hand shake + our cameras, we also have to follow rules 1 / lens focal size. Then we observe how quickly the subject of moving images. Subject of the picture moving at high speed requires a very fast shutter speed.
6. Choosing lenses and lens focal optimal
Not all lenses that produce the same results. There is a wide lens, standard lens and a telephoto lens. Each focal lens has its own characteristics. Wide lens gives the impression of the dimensions, distortion, and depth of focus within. On the other hand, a telephoto lens to make photographs into two dimensional (compression effect), making the depth of focus becomes thin and bring up the subject much.
Try a photo with a different lens and the focal lens different to getting to understand the effects caused each lenses.
7. Determine the optimal Exposure
The camera automatically determines Exposure is usually optimal. But sometimes the camera settings are made not in accordance with our wishes. For example, if we want to make a low key image (photograph dark) or high key (light nuanced picture), we must organize itself so that the optimal camera settings.
Determine the camera exposure settings depending on the outcome you are visualizing with manual mode or use the Exposure compensation function, when using automatic or semi-automatic settings (P, S, A)
8. Timing
Decide also whether the time of the shooting is important or not. For photos still life (the subject is not moving), the timing might not be too important. But for candid photos, especially sports, timing becomes very important. If so, practice can take a photo with precise timing. Exercise anticipation, patience and controlled the camera / photographic equipment so you can take pictures with optimum timing.
 |
For sports photo, timing and setting the optimal shutter speed is essential |
No comments:
Post a Comment