
This time though tuturial KameraFoto.Net will discuss digital editing using Adobe Photoshop software. That is by selecting a color in the picture. With this color selection, the main object can be more alive and meninjol. It could also give the impression of more on a photo or image. Many ways in which to selecting a color in the image in Adobe Photoshop, but that will be used in this tutorial is to use masking techniques. This tutorial is quite biginer and fairly easy to learn. And sure you can. Here's the tutorial.
Open the Adobe Photoshop software.
Press the "D" in order to display its color changed to default
Open Image File which will be edited.

Do not forget to edit each photo is better in duplicate / duplicate background layer, just in case. Right-click the image on the layer, select the duplicate and okay.
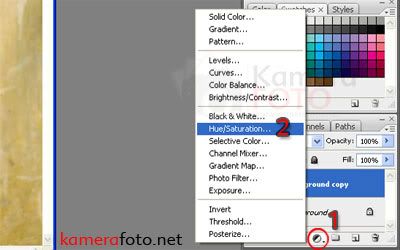
Click the Create new fill or adjustment layer on the layer panel and select Hue / Saturation and click.
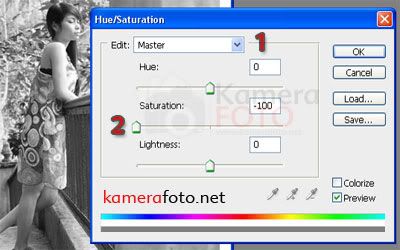
Edit Master and his fox numbers saturation becomes -100, then the picture Anka changed color to grayscale and then click ok
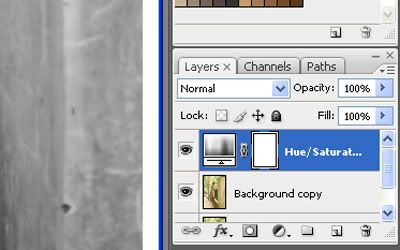
Then on the layer panel will be formed a new layer named Hue / Saturation.
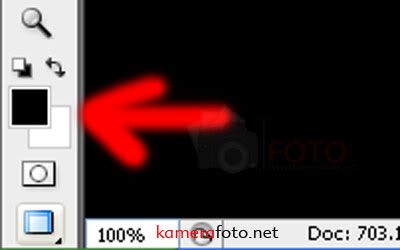
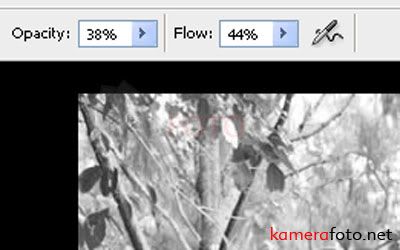
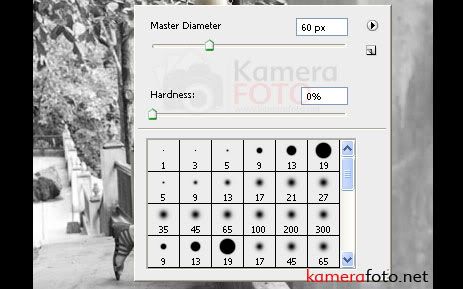
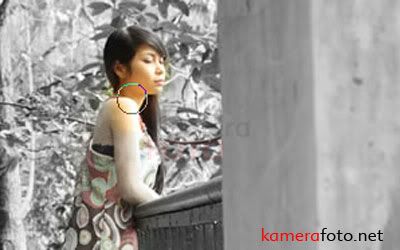
Then we will start selecting color in an image by removing the layer mask in the Hue / Saturation, How to select a brush, and black color to erase while the white color to patch it back. Do it carefully, and opacity settings bursh diameter and flownya.
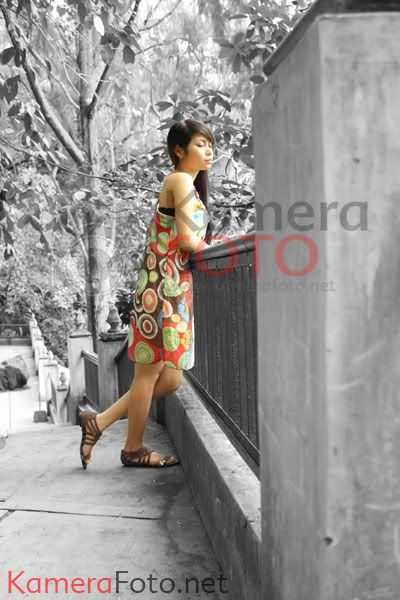
So the end result like this
source: kamerafoto.net
No comments:
Post a Comment